Pretty Frog Closure

Best Blog Tips


Originally, I made this frog to close up a capelet, but it is such a pretty way to close things and it was so liked that I took a second look at it. That made me realize that it makes a terrific closure for a purse, a bag or a tote, so here it is!


Frog Closure-Let’s make a bit of rope for the frog. With Pumpkin, ch 2.
Row 1- 1 sc in second ch from hook. Turn. (No ch 1.)
Row 2- Insert hook in little loop that formed on the side of the sc and pull up yarn, you and complete sc. Turn. Continue repeating row 2 for the length of the rope you want to make.
In this case, the rope should measure 14” long. Fasten off, leaving long tail to sew with.

Thread blunt needle with leftover tail and, taking one of the ends of it, begin to turn the rope around itself, as if you were going to form the shell of a snail. As you turn, secure each turn onto itself by making small stitches on the loops on the sides. Turn a bit, and inserting the needle into the loops that will meet at the top, where the rope turns and at the bottom, where you just turned, stitch the curl in place. When you have turned the rope three times, secure and fasten off. Weave in tail.

Repeat on the other end, leaving the center unworked for now. When you are ready to sew your frog on, Join some yarn to the back of the frog in a discreet spot, thread blunt needle with the yarn you just joined and sew the center of the frog together, using the loops on the outside edges of both sides of the large loop, until you have a hole that will comfortably fit the button you have chosen. Pin the frog in place and sew it to the purse or bag. Fasten off, weave in tail.


.............
Who Do You Think You Are?
(You are more special than you think!)
Best Blog Tips

Frog Closure

Best Blog Tips
Originally, I made this closure for one of my neckwarmers, but it works so well for a purse or bag that I decided to share it here.

Materials-
Worsted weight yarn scraps to match or contrast the bag or tote you are making.
Crochet hook size H
Scissors
Sewing thread
Sewing needle
Button of your choice


Frog-style closure: With Lipstick yarn and G hook, make a crab stitch braid that is 10 inches long. Fasten off leaving a long tail to sew with.
You can make your closure in several ways, but let's try a simple one. Bend the crab stitch cord you just made in half, take the left leg of that bent cord and cross it over the right side leg, forming a loop, without undoing that loop, insert that same leg of cord into the center of the loop and pull gently, until you have a nice knot that looks almost like a Josephine knot, and two pieces of crab cord at both ends. You are going to bend those two pieces of cord and sew them with the tail you left, one upwards and one downwards, to form your frog. Then you will sew this to the neck warmer at a height that is comfortable to close it around the neck, using the small loops of the crab cord to anchor your stitches. Fasten off. Sew button opposite loop of the frog closure on the other side of the neck warmer. Fasten off.
Note: Since this is a closure and it will pulled ever time the neckwarmer is used, sew your stitches firmly, not tight, but firm so that the pretty frog will not come apart.
You're done!
This pattern has been corrected. Thank you again, Margaret!
Fire-ice-aiken, the pattern is simpler now!


.............................

Determining the Will of God
Best Blog Tips

Betty Jo's Braid

Best Blog Tips

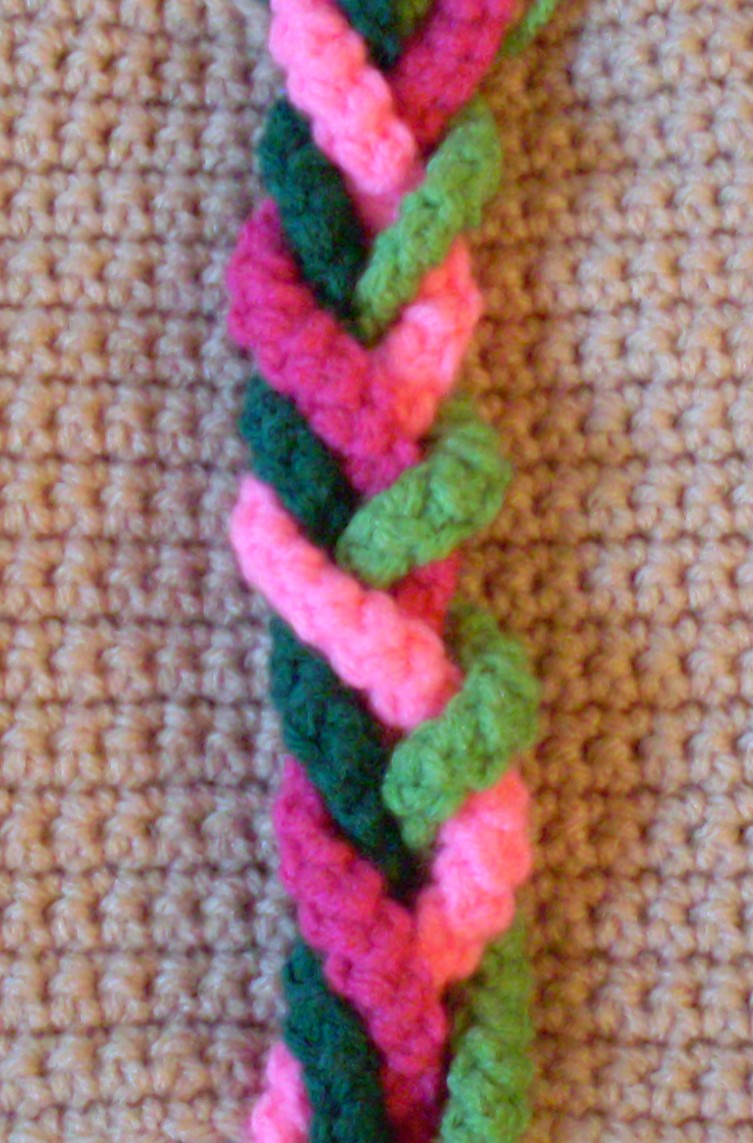
For this purse strap you will need 4 ropes. Each of a different color (please refer to previous tutorials to learn how to make the crocheted ropes. Use the Search box to find them.)
For this example I used Red Heart colors Shocking pink, Pretty 'n Pink, Spring Green and Kelly Green, but you can use anything you like or what will match with your bag.

Once you have your ropes, you make the strap as follows:

1- Twist your first two colors and pin them down at the top and at the bottom of the working surface, so that the twist will not unravel and remain firm.
2- Insert the other two cords through the center of the first twist, bring the ends around the edges and push them down the center of the next twist, keep repeating until you get the length you want.
3- Secure both ends with a safety pin before you take your braid off of your working surface and finish your strap by sewing the ends to your purse ring securely.

This makes a pretty easy 4-color braid that even a braiding beginner can make in a jiffy!

...................................
God Loves You!
Best Blog Tips

Betsy's Woven Purse Handle

Best Blog Tips


This is one of the easiest weavings to make for a pretty purse or bag handle.
Make 3 crocheted ropes in 3 different colors which either contrast or harmonize with your bag, tote or purse.
Make them a little bit longer than you think your need them, to allow for the twisting and weaving, but leave one end
attached to the ball or skein, just in case you need to add more length to complete your project.
Attach the finished end of each rope to a pillow or something that will allow you to do the weaving without the ropes moving all over the place. The rope that will weave through the twisted ones, if still attached to a ball or skein, must lie on the
opposite direction than the others, otherwise, the ball or skein will not permit you to pass the rope through the twists.
To make the woven braid, proceed as follows:

1- Attach first two braids. Then twist them over each other, pin down to keep them in place.
2- Take weaver rope and then pass it over and under in between the middle of the twists.

Once you have the desired length, sew to a purse ring and you have a pretty embellished strap for your next purse, tote, or bag!


When You Need to Have Strength. . .
Best Blog Tips

Marly's Braid or Purse Strap

Best Blog Tips


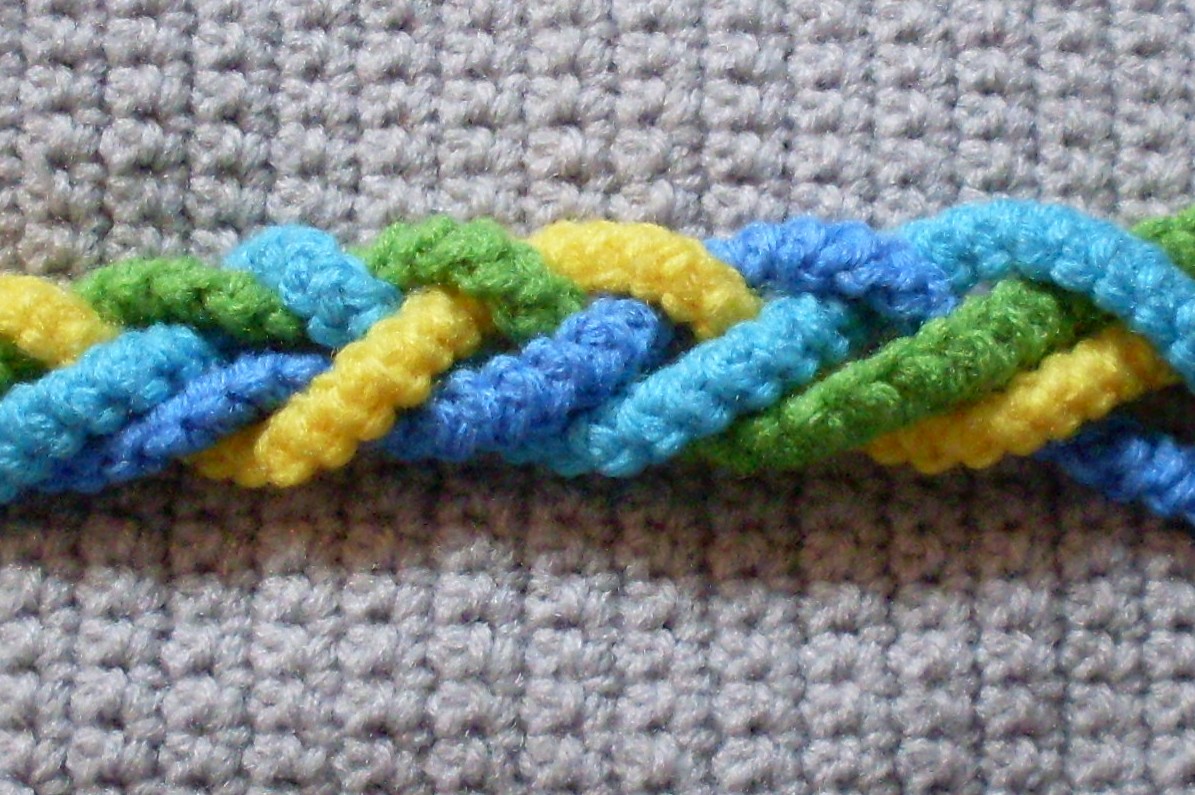
This pretty braid can be used either to embellish a purse or a tote bag or for the strap of the bag. To make this easy but pretty braid, make 4 ropes in different colors, I used Red Heart yarns because they are easily found by all, the colors I chose, if you happend to like the color combo, were:
Bright Yellow, Delft Blue, Turqua (to get a nice aqua shade)and Spring Green, for the MacIntosh apple tone (please refer to previous tutorials to learn how to make the ropes.)
To make the braid proceed as follows:Pin the ropes to a pillow or to a piece of cardboard (with a piece of fabric underneat to keep the braid clean) to make it easier for you to make the braid.

1- Cross rope 3 over rope 2.
2- Without bringing the to the top, but moving them underneath the previously made cross, bring rope 4 and rope 1 to the center and cross rope 1 over
rope 4.
3- Cross tope 4 over rope 3 (bue over aqua) and rope 1 over rope 2 (green over yellow).
4- Cross rope 3 over rope 2 (aqua over yellow).
5- Bring Blue and green ropes to the center, underneath the other 2 ropes. Cross blue over green rope.
6- Bring the other two ropes underneath the previous rope and cross the yellow over the aqua.
7- Cross the aqwua over the green and the yellow over the blue.
8- Bring the yellow and the aqua underneath the other two ropes and cross them.
9- Bring the blue and the green under the yellow and the aqua and cross them.
Continue these steps for as long as you want to, thios will make a lovely braid for the front of a bag or a very striking handle for a bag!

When Things Go Wrong...
Best Blog Tips

Debra's Braid

Best Blog Tips

This is a fun braid, it is a combination of 3-strand and 4-strand that occurred to me as I was working with ropes. I named it after a friend of our family. This braid makes a pretty embellishment for a bag that needs a little "something."
To make this braid, you will need 4 crocheted ropes (please look at previous tutorials to learn how to make them!) preferably of 4 different
colors so that you will be able more easily to track where each one goes (and the braids look prettier that way.)
To make braid proceed as follows:
1- Working only with the first 3 ropes, cross rope 3 over rope 2.
2- Bring rope 1 over rope 2.
3- Bring rope 3 over rope 2.
4- Bring rope 1 over rope 2.
5- Bring rope 4 underneath rope 3 and over rope 2, bring rope 1 over it.
6- Bring new rope 4 under rope 3, over rope 2 and under new rope 1.
7 to 10- Ignoring new rope 1, and working only with 3 ropes, rep rows 1- 4.

Rep all these rows over and over to get your rope.


When Things Go Wrong...
Best Blog Tips

Gladys' Braid

Best Blog Tips

This is a simple 3-strand braid which is left open for effect. It is a bit asymmetrical and angular, which makes it interesting and less common than the usual 3-strand braid, it is also very easy to make.


Glady's braid will be most effective in 3 colors, especially if the they contrast against the background of the bag.
Make a ball of yarn for each color of rope you will be making, then make your ropes.

To make it proceed as follows:

Make your crocheted ropes as we have made them in previous tutorials. (Please take a look at our previuos tutorials and beautiful braids.)
Make twice as much as the size of the bag or tote you want to embellish. Leave one end of the rope attached to the ball of yarn, justin case you run
out of rope before you have finished the amount of braiding you need or on the other hand, if you have a bit more rope than you need, to be able to unravel and adjust
it.

Pin one end of ropes to edge of bag or purse, leaving an excess that will be folded over the edge of the bag and which will disappear under the lining.
To braid, work in the following manner:

1- Bring rope #1 over rope #2, then pass rope #3 over rope #2.
2- Bring new rope #1 over new rope #2, and new rope #3 over rope #2. (Leave the braiding quite "open" so that the fabric of the bag will show through.)
Continue to repeat these two rows, continuously until you have the length of braid you want.
............................
Alone in the Crowd
Best Blog Tips